
How to Host Your Own Paint Party At Home
Step-by-step guide to hosting a DIY paint party at home for kids. Tips on supplies, setup, canvas designs, and cleanup from a professional party artist.

I’m so excited to talk about this subject! Homeschool art classes and projects are right up my alley as an artist and a homeschool mom myself. I know there is a ton of information out there with curriculum, print-outs, books and more, but today I just want to encourage you with a few simple ideas that you can easily do at home. Art doesn’t have to be complicated (or even that messy). The most important part is to get your kids thinking creatively and using right-brain imagination and innovation.
One of my favorite things to start with is the color wheel. Most kids will happily use a box of crayons and some paper to scribble a few drawings, but thinking more intentionally about why they are using certain colors or discovering how colors interact with each other takes things to the next level. For example, complementary colors like blue and orange are high-contrast colors, yet they feel harmonious. In other words, they really grab your attention (so many sports team logos use complementary colors. Once you see it, you can’t un-see it!).
Or maybe they start noticing that colors next to each other on the color wheel (like blue-green and green) have a calming effect. You could then go into cool vs. warm colors or the fact that blue-green and green are called analogous colors on the color wheel (this is a fancy way of saying they are next to each other). Do an internet search for “color wheel” and you’ll be on your way to discovering this and so much more about the colors around us. Printing and coloring their own wheel is a project in itself!
Art stimulates the right side of the brain, so why not do something to incorporate the left brain at the same time? By using the color wheel idea from above, you can effortlessly incorporate new vocabulary and spelling words (like tertiary, secondary, hue, and contrast). You can also take the color wheel (that they color) and have them glue or tape small items that match the colors to it from around the house. Buttons, colored paper clips, a section of a straw, or some pipe cleaners are just a few examples. I always try to use as many items that I already have at home first before rushing to buy something. Displaying their wheel somewhere prominent can lay the foundation for a year (or maybe even just a semester) of art at home.
Another way to incorporate art into other subjects is through creative writing. Use some starter questions to get their imagination flowing. What would it be like to be a crayon? Would you stay away from sunlight to avoid being melted? Would you get upset if your tip was broken? Maybe you would scream your best crayon scream to be picked from the box when you saw a new coloring book on the table. What would be your favorite thing to color? If you have a child who struggles with creative writing, these kinds of prompts can sometimes help even if you just talk about your answers. Of course, adding a coloring page or two to the story or turning it into a little pocket-sized book is a bonus win-win.
Let’s take it a step further and talk about journaling. For some kids, a journal or sketchbook full of blank pages is too overwhelming. That’s ok! Draw the color wheel for them (trace a cup or a bowl for a nice, neat circle) and have them color it. Or use a Sharpie and a ruler to draw a bunch of straight lines that overlap each other. Then, have them use crayons or colored pencils to color each section with a different color. It will end up looking like a stained glass window. They can pick whatever colors they want, or challenge them to use monochromatic colors (all the colors of a single hue). If they really enjoy that, use one page for each color on the color wheel and they’ll end up with a book of rainbow-looking stained glass. They could even start at the top of the page with darker colors and end at the bottom with lighter colors for an ombre effect. There are so many possibilities!
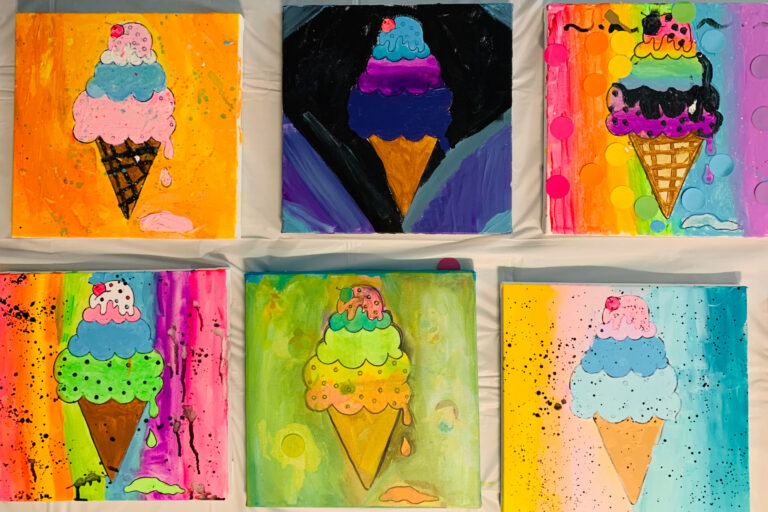
Back to the journaling part! For more creative kids, let them decide how to use a few of their blank pages to describe how they are feeling that day. Maybe it’s dark and rainy outside and they just want to scribble. Or maybe it’s getting closer to the holidays (or their birthday) and they want to write and then decorate a colorful wish list. A stream of consciousness page is fun to get out all the things they are thinking about in a 10-minute period. Set a timer and have them write in different sizes and at different angles every word that comes to mind. This can be a very revealing project! If they seem to be experiencing some writer’s block, give them a theme like naming as many ice cream toppings they can think of. As an added step, draw a giant ice cream cone and have them write the words inside the outline.
For older kids or teenagers, print an alphabetical chart in their favorite font and have them try to write the words in that script. Hand lettering is so much fun if you can get the hang of it. Handwriting in general is so important in this digital age and sometimes I feel like it’s a lost art in and of itself! Getting them to write creatively in different colors and scripts along with creatively writing short stories can get them thinking differently and maybe even help in other areas like reading.
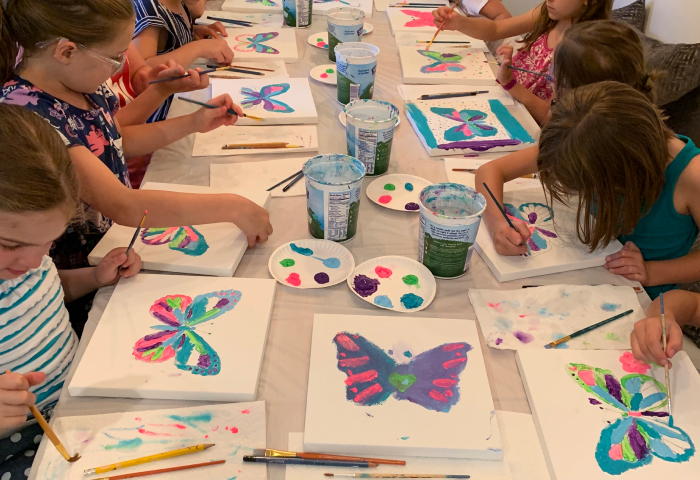
When you’re ready to invest a little bit more into art supplies, consider buying a value pack of canvases, some craft paint, and an assortment of brushes and plastic palette knives. You could take one canvas and turn it into a lesson about mixing colors. Use a pencil or marker to write the color words from the color wheel (red, red-orange, orange, etc). Then have them paint swatches of color above each word and tell them they’ll have to mix colors together to come up with the secondary and tertiary colors. If you plan to keep the canvas around for a while, consider painting it white first as a background layer so the canvas doesn’t attract dirt and dust when you’re done (canvases that are completely painted are easy to wipe down later).
Another canvas could be used for a “free art day” where you give them some paint along with a bunch of other supplies like crayons, markers, colored pencils, or even chalk pastels. Let them experiment with the supplies to see what they like to use better. Maybe they even discover a few things like how marker over dry paint makes the colors pop out. You could even talk about the scientific properties of the different supplies and how the wax in the crayons reacts to water and watercolors. If you’re not ready to buy a pack of canvases, look for an inexpensive pad of watercolor paper (or the thickest pad of regular sketch paper or art paper you can find) and have them draw first with crayons and then paint over it with watercolors.
Painting with watercolors is also very calming, less expensive, and can be easier to clean up than paint. Make sure to instruct them to use a small amount of water to get richer colors that will be easier to see after it dries. Too much water will dilute the paint and may even make holes in the paper (I call them paper crumbs). Another idea with watercolors is to paint a piece of paper and then write a note to someone on it after it is dry. It’s fun to write on such beautiful and colorful paper!
One of the easiest ways to experiment with watercolors is to combine them with table salt. This could get a little messy, so consider using a plastic or aluminum tray (or make your own out of foil). Paint a piece of paper with watercolors and throw some salt onto it before it dries. The salt crystals will create patterns in the paint and “grow” right before your eyes. Brush off the excess salt when the painting is dry and use some complementary colored pencils to outline the shapes the salt makes.
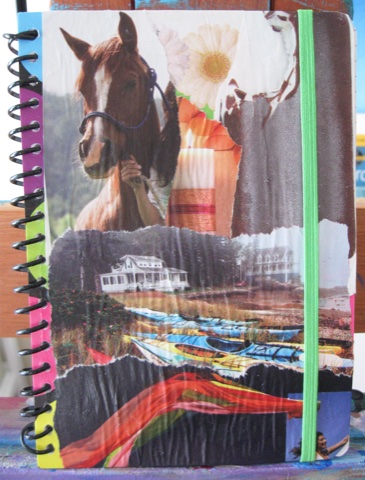
One of my favorite go-to ideas (especially for a rainy day) is a good old-fashioned collage. This is a fun project if your child wants to decorate the front of their art journal. Use old magazines, coloring book pages, or even watercolor paper they painted themselves to tear or cut out words and pictures. You can use everyday white glue, or buy special collage glue. Sometimes the plain white glue can make the paper crinkle up when it dries. Try your best to smooth out the glue under the paper and use it again to paint a top coat of glue at the end when all the areas of the front of the journal are covered. This will give it a slightly glossy look and prevent any corners from tearing. Don’t forget to overlap some of the pieces of paper.
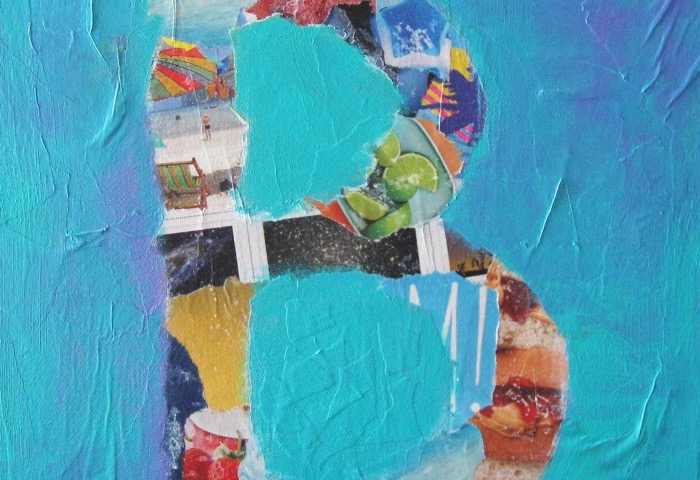
To combine more elements of creative writing and thinking, ask them to find words or phrases in the magazines that describe them. You can also print out a favorite quote or saying in a fancy font (be aware that sometimes home printer ink will smudge under too much glue). If they don’t like the look of the white printer paper, have them color or paint the paper before gluing it. Some kids might like the super straight lines of using scissors to cut each piece, while others might like to tear them out for a more distressed edge. Allow them to make these decisions so they end up with a journal they are really proud of and look forward to using.
Collages can also be done on regular paper, construction paper, cardstock, or poster board. Combine this with one of their interests like cooking or animals. If they really like to bake, create a few collage pages in their journal and have them write a recipe on an index card and paste it on top of the food collage. Again, the more you can combine their interests with art the better. They will stay engaged with the project and probably ask to do more.
If they love a particular animal, create a collage page with all kinds of pictures of that animal. Then, have them write all the word associations they can think of on top of the pictures with a bold marker like a Sharpie.
Sticking with the journal concept, the next thing we’ll talk about is taking all this wonderful art goodness OUTSIDE! Depending where you live will determine how and when you can do this. Use their journal pages (or a heavier book) to press some grass or small flowers. Glue them onto the journal pages when they are flat and dry. Older children who enjoy writing can take something they find outside and turn it into a small poem. You can also find writing prompts online or make up some of your own. No matter what they write about, writing in nature can be very therapeutic.
Another nature art idea is to find leaves or tie some pieces of grass to a stick to make a “nature brush”. Experiment with different types of paint on the journal pages and then write or document the materials used. This could turn into a mini-science project if you can come up with a good hypothesis on which natural materials will work better with paint. Or have them collect some rainwater the next time it rains to use with their paint while talking about the water cycle.
Landscape drawings can also be a fun way to remember certain days or keep track of the weather for a week. They could also draw the cloud formations for 5 days in a row and then write about which clouds produced rain (if any) along with the different types of clouds. Go even further by creating a journal page with cloud types using cotton balls. Color the page blue and then write a label for each cloud type (like cirrus, cumulonimbus, and cumulus). Try to create the different types by stretching and separating the cotton balls and gluing them under each label.
When it comes to nature art, there are too many ideas to list here. I’ll leave you with one more for now; start a bug, leaf, or rock collection. Use the journal to draw what happens when the leaves dry or examine the rocks with a magnifying glass and draw some of the tiny crystals. Draw and label the bugs or name them and write a short story with a coloring page. If you can find a caterpillar, use it as an opportunity to draw and color the life cycle of a butterfly. We have also done this with moths. Again, tailor this to your child’s interests for maximum impact!
I hope I have given you some ideas on how to easily and inexpensively add art to your homeschool curriculum. Try not to overthink it or compare yourself to other families who may seemingly have a more robust art program. Remember that each household and child is different. What you may lack in artistic ability you will make up in other areas. The important thing is to allow your children to experiment and experience art a little bit at a time and as much as you can (with both your time and money).
If you still need help teaching and introducing art to your kids, check out a few craft books or art history books from your local library. Show these to your kids and ask them to show you what parts of the books they are interested in. Maybe older kids will want to study a certain artist or try to recreate a famous painting. The possibilities are endless! After all, “You can’t use up creativity. The more you use, the more you have.” – Maya Angelou
Step-by-step guide to hosting a DIY paint party at home for kids. Tips on supplies, setup, canvas designs, and cleanup from a professional party artist.

Learn how to start your own kids paint party business. Practical tips on supplies, pricing, websites, and building a client base from an experienced party artist.